
Hope you are having a fantasy week so far! I had a very busy weekend packing and shipping some of my paintings to a CWA(California Watercolor Association) show. I want to go over one of the painting that got accepted and share with you the process. It is a landscape painting of a golf resort. I'm not a golf player, but I always enjoy the beautiful golf courses. I have no idea how do they keep hundreds of acres of grass perfectly green and flat (I can't even keep my few square feet backyard lawn look nice). But I can understand why so many people enjoy this sport! To be able to get away from the noise and commotion to places like these is such a luxury experience.
Most golf paintings I saw were done in oil and in photo-realism. But I personally like to leave that to a good high mega pixel camera. I want the painting to "feel" real and let you experience the emotion of being there. The fresh air, the cool breeze, the crisp sound of the club hitting the golf ball!
The Sky
1. I used clean water wet the sky with a big brush, a bit randomly but keep in mind the shape of the cloud and where the soft edge to be.
3. I started to give the cloud some volume by adding some dark. Use the same color with your sky but add some other paint such as Alizarin Crimson and a touch of Burnt Umber. I re-wet the area as needed, and I soften some edges with clean waters. I turn the paper side ways sometime so the wash won't carry all the paint vertically.
2. While it's still wet, I started to put in some Cobalt Blue, that will be the blue sky. Again I keep in mind the shape of the cloud. When the paint hits the wet area, it becomes a soft edge. When the paint hits the dry area, it'll be hard edge. Clouds are basically a mixture of hard and soft edge.

4. I worked down rapidly to the horizon. The reason I had a tape is that I want the edge to be straight and clean. Sea line should be very straight and clean.
The mid-ground land

1. A lot happens in this part. First I waited the sky to dry, then I started to paint the mid-ground land. I used a relatively big brush, not as big as the brush for the sky, but my second big brush. This allow me to be able to cover enough ground with as few brush stroke as I can. Always remember to use the bead and you move down, and adding different shades of colors while you can when the wash is still wet. I left out the ocean in the foreground for now. After the first wash for the land is dry, I use a masking tape again to tape off the sky and paint in the ocean in the far distance.
2. The tap removed, and we have a nice clean ocean line. I then started to paint the shadow of the rocks. The mixture should be more dry. Just add enough water to let the paint flows easily without getting watery. The light is from top down so I kept most of the green belt light. When painting the shadow of the rocks, I tried to stay lose and the shape sharp. The contrasts of the light and dark is what gives the rock forms. What I like about this scenery in particular is the contrast of the sharpness of the rock and the softness of the sky.
The Ocean
1. Now it's time to do the Ocean. it's really important we do it in one go. I did some fast strokes around the rock to let the dry brush edges becomes the foam and the crashing waves. While the wash is still wet, I added in some quite heavy mixture of Cobalt Turquoise and Cobalt Blue to gives the water some depth. The ocean in the distance typically don't have much reflections, but I added a bit of reflections for the big rock on the right, just to make it a bit more interesting.
The Foreground and some last touches.
1. I added some trees in the background rock. It's just a very simple shape so I don't fuss with it too much. I then started to paint the foreground green. Again I kept it as clean as possible. I painted around the golf ball. My usual green mixture is using Cobalt Turquoise with Yellow Ocher and other warm colors. I splattered some clean water for subtle textures, and some dry brushing after the wash is dry.
2. I did a glaze for the foreground green after it's dry. Making it a bit darker will separate it from the mid and background. This is where the viewer is standing, so it should feel solid. It's also the time to added some seagulls in the background sky and some final touches here and there.
The finished painting
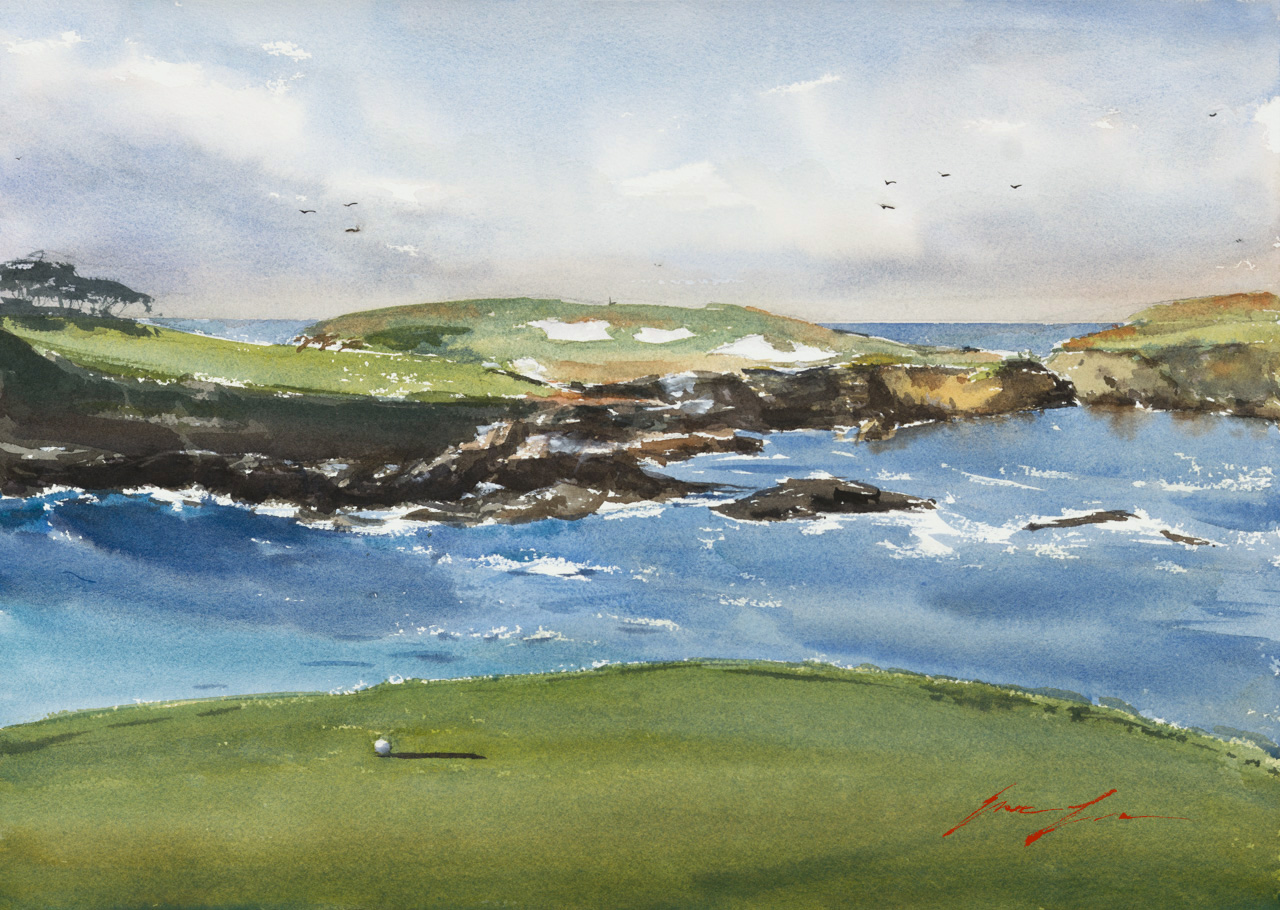
Here's the finished painting. I did some quick shading on the golf ball and give it a quick cast shadow.
I hope you like the painting and the process I'm sharing. As you can see, if you know where the shapes are separated, you can work your way down section by section. You don't have to paint everything at once and get confuse. It's worth noting that I spend quite sometime drawing so I don't have to second guess myself when I paint. Of course there are still some spontaneity when I paint, but a good drawing prevented me from getting confused.
If you are in the Northern California, near Brentwood, WA. Hope you can visit Delta Gallery in Brentwood, CA between April 1 - April 29. =) You will be able to see this painting in person along with my other two paintings.